Using your own router with Sony NURO Hikari NSD-G1000T
March 05, 2024
It comes up from time to time on the English speaking community in Japan that someone wants to do a little more home networking than the service providers here like to let you. Not naming any names, since it’s pretty much every major provider. One of the simplest little changes people love to me (me included) is to use our own router instead of the ISP provided junk. And ISPs love to make that as frustrating as possible, by locking their service behind arcane authentication methods that render your own hardware impossible to replace their own router/modem entirely.
I use NURO Hikari, with the newer (at time of writing), and worse that before NSD-G1000T router. And I with to use my own ASUS router with it. And boy was it a pain to get the setup right. So here I am with a simple step-by-step with how to use your own router with the current batch of medicore ISP provided hardware.
There’s information floating around in Japanese already, but I found it a little cryptic or incomplete, so this will be a simple step-by-step with screenshots of what you should configure. Essentially we’re going to be using the DMZ method, since the features that used to work with the previous model Sony shipped is unsupported in this “upgrade”.
Prerequisites for this are that your ASUS router is up and running, connected to the NURO router, and you can connect to each either via WiFi or LAN.
Disclaimer: follow these steps at your own risk. I am not responsible for what you do to your equipment, and have no idea what I’m doing!
1. Open Hikari Router
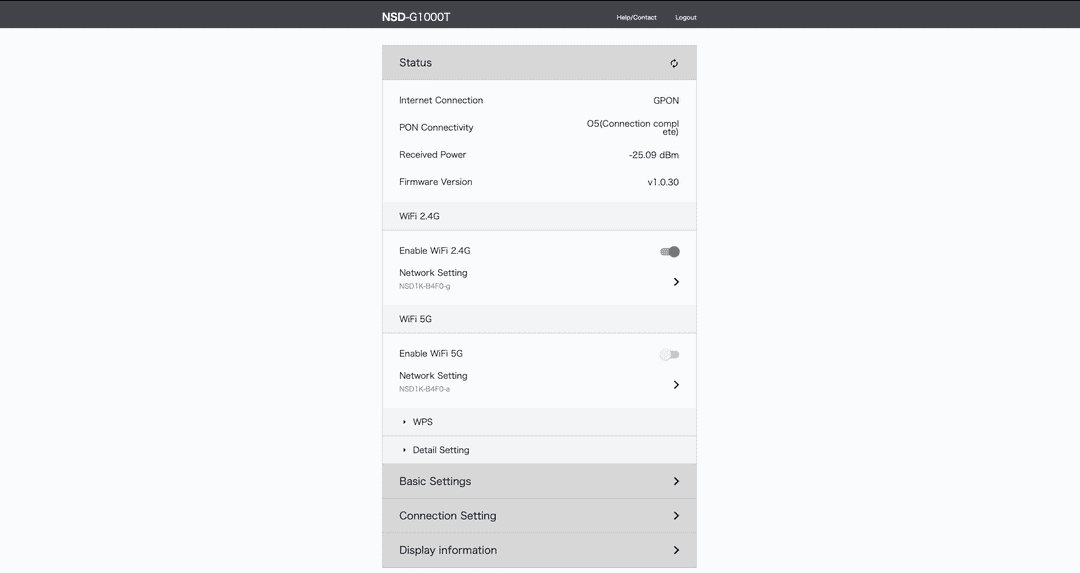
First step is to open thr Sony router settings (typically 192.168.1.1).
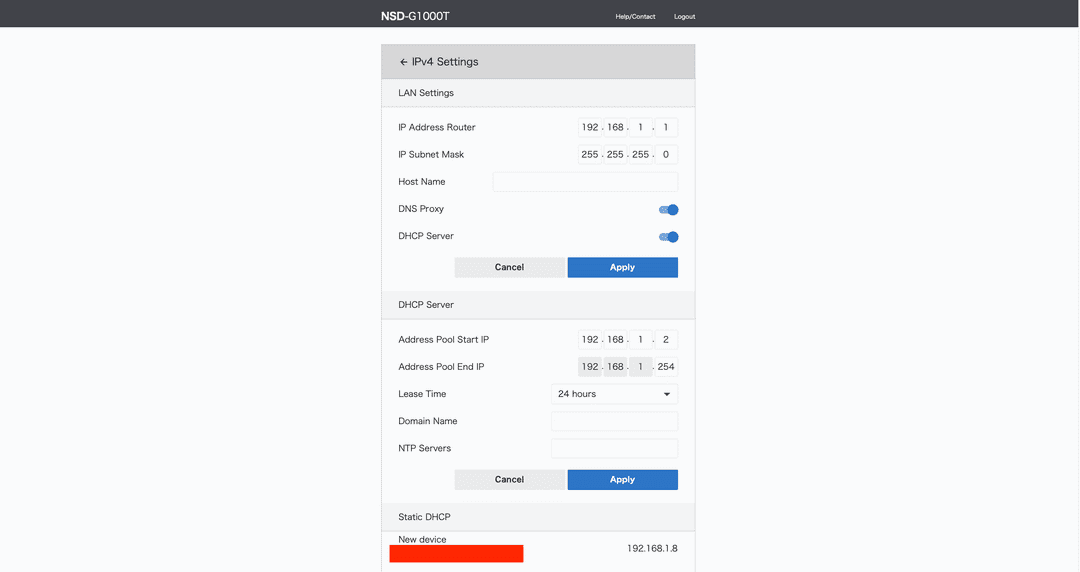
2. Go to LAN settings
Then we navigate to LAN settings. Take note of IP (192.168.1.1 and subnet 255.255.255.0 in the below screenshot)
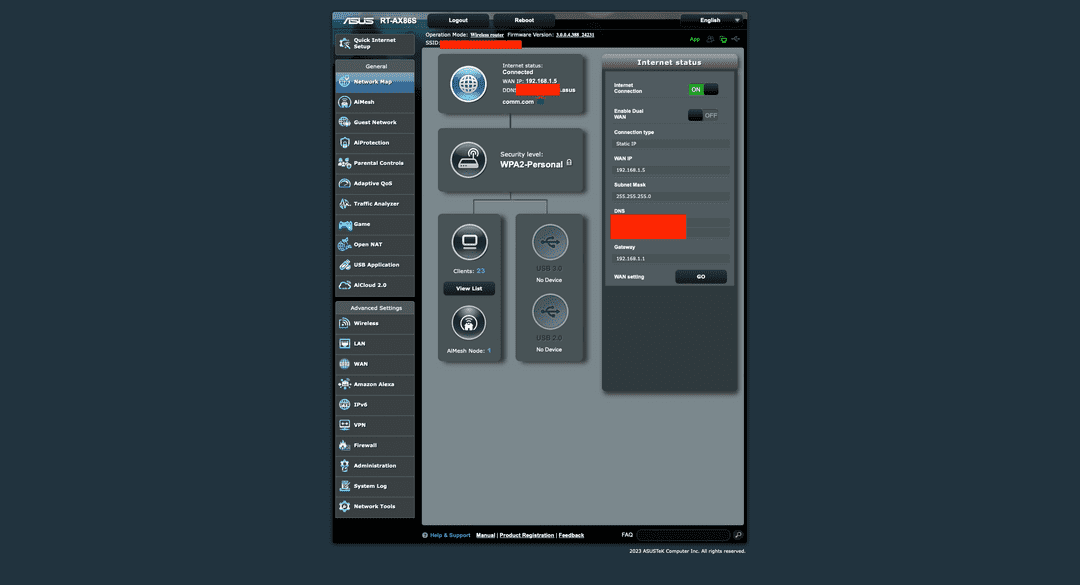
3. Open ASUS router.
Next go to your ASUS router (typically router.asus.com should redirect to the login page). Take note of the listed WAN IP, we’ll need this later.
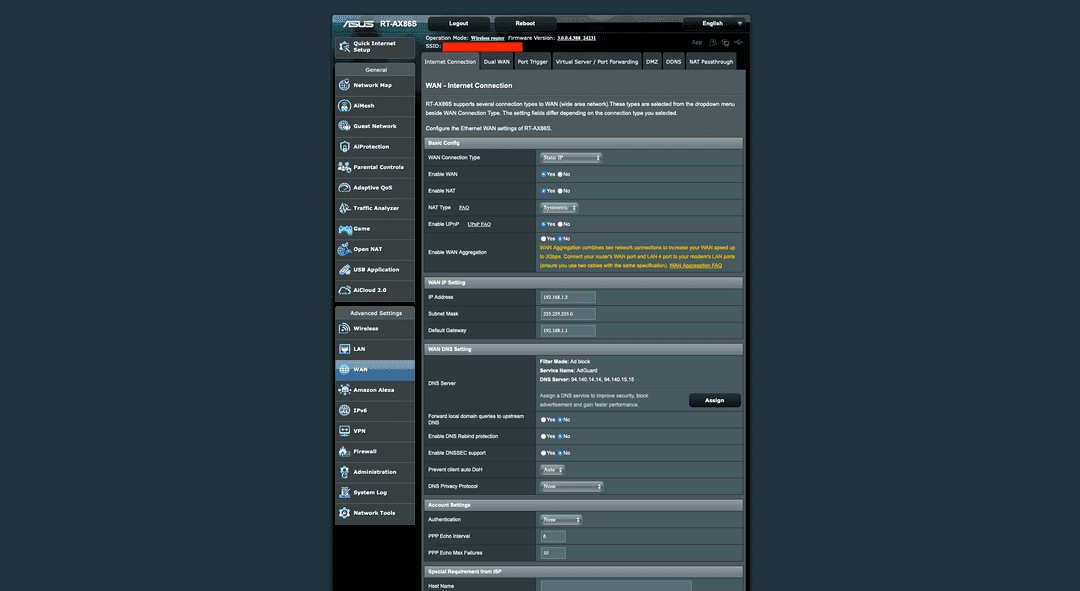
4. Go to WAN
Click the WAN section in the sidebar, then configure your WAN settings as follows:
- Set IP to static
- Pick an IP (you can use the router’s current IP listed on the top page)
- Set LAN IP and subnet you noted earlier.
5. Go back to Hikari router
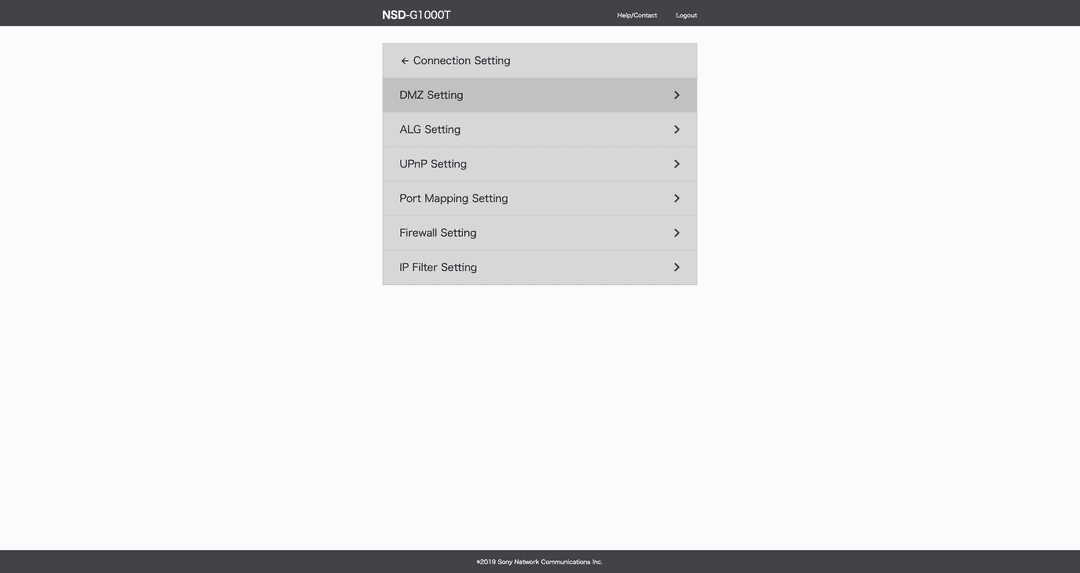
Back in the Hikari router, we can now configure our DMZ settings. These ca be found under ‘Connection Settings’ on the top page
6. Go to DMZ settings
Open DMZ settings
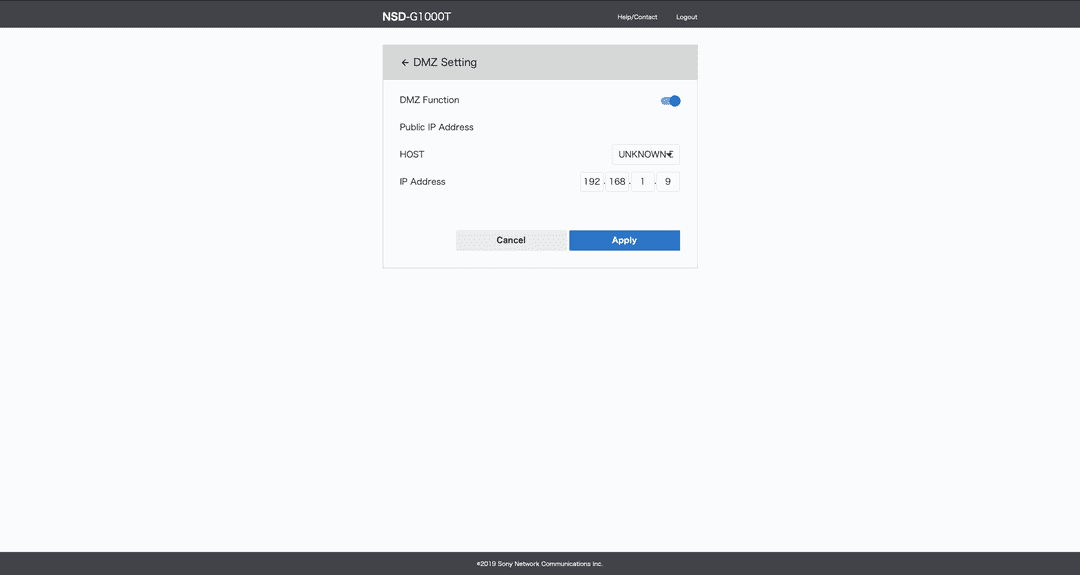
7. Enable DMZ
Enable DMZ, and point it to the WAN IP you noted on your ASUS router earlier. You might need to figure out which host to select, if your router doesn’t identify itself with a friendly name. The easiest way do this is to either:
- Disconnect all other devices from the network
- Open developer tools and view the source of the dropdown (additional information about each option in the select dropdown’s option list)
And that’s it! You should be able to completely use your ASUS router for all your home networking and leave your NURO device in a corner somewhere. You can turn off the wifi on it entirely if you like too.
This method will stop the ASUS router from complaining about double NAT, and should actually allow you to use some of the more exotic features such as the DDNS feature some routers offer. This should also largely fix other issues with common home network services, such as Plex’s Remote Access throwing warnings.

